A Single Dependency Gives Any Spring Boot App a Login Page
theme: smartblue highlight: a11y-dark
1. What Problem Does It Solve?
Sa-Token-Quick-Login can quickly inject a login page into a system with zero code.
Imagine we've developed a very simple little system, for example: a server performance monitoring page. We deploy it on a server, and by visiting this page we can check server performance information anytime, which is very convenient.
However, while this page is convenient for us, it's also convenient for some malicious attackers. Since the page is exposed on the public internet without any protection, any computer with a browser can access it at any time!
For this reason, we must add login authentication to this system, so that only people who know the backend password can access it.
Thinking it through, to complete this functionality you would need to:
- Write a frontend login page, hand-code various form styles
- Find a suitable ajax library —
jQuery?Axios? Or just go without frontend-backend separation? - Find a suitable template engine, like
jsp,Thymeleaf,FreeMarker,Velocity... which one to choose? - Handle various backend interception and authentication logic, and interface between frontend and backend
- You might also run into the headache-inducing
ContextPathhandling in template engines - ...
You'll quickly realize that you can finish a monitoring page in an afternoon, but this login page might take you two or three days — an extremely poor use of time.
So now you might have a question: isn't there any way to quickly add a login function to my small project?
Sa-Token-Quick-Login exists precisely to solve this problem!
Sa-Token is an open-source, free, one-stop Java permission authentication framework. It can solve: login authentication, permission authentication, microservice gateway authentication, SSO single sign-on, OAuth2 unified authentication, JWT integration, API parameter signing, API Key authorization, and a series of other permission-related issues.
- Online documentation: https://sa-token.com
- Open-source repository: https://gitee.com/dromara/sa-token
2. Applicable Scenarios
Sa-Token-Quick-Login aims to add a login authentication function to a project at the lowest possible cost.
- Simple: Just introduce one dependency to inject login functionality into the system — fast, simple, zero code!
- Not customizable: Since the login page cannot be customized, Sa-Token-Quick-Login is very unsuitable for the login authentication module of ordinary projects. STQL also has no intention of solving the login authentication module for all projects.
Sa-Token-Quick-Login's positioning is for this kind of scenario: your project needs a login authentication function, this authentication page doesn't need to be fancy, it can be ugly, but it must exist, and at the same time you don't want to waste too much time on the login page. Then you can give Sa-Token-Quick-Login a try.
3. Integration Steps
First we need to create a SpringBoot demo project, for example: sa-token-demo-quick-login
1. Add pom dependency
<!-- Sa-Token Permission Authentication, online docs: https://sa-token.com -->
<dependency>
    <groupId>cn.dev33</groupId>
    <artifactId>sa-token-spring-boot-starter</artifactId>
    <version>1.46.0</version>
</dependency>

<!-- Sa-Token-Quick-Login plugin dependency -->
<dependency>
    <groupId>cn.dev33</groupId>
    <artifactId>sa-token-quick-login</artifactId>
    <version>1.46.0</version>
</dependency>
Gradle method:
// Sa-Token Permission Authentication, online docs: https://sa-token.com
implementation 'cn.dev33:sa-token-spring-boot-starter:1.46.0'

// Sa-Token-Quick-Login plugin
implementation 'cn.dev33:sa-token-quick-login:1.46.0'
Note: For SpringBoot 3.x please switch to sa-token-spring-boot3-starter, for SpringBoot 4.x please switch to sa-token-spring-boot4-starter. The sa-token-quick-login plugin itself does not need to be changed.
2. Main class
@SpringBootApplication
public class SaTokenQuickDemoApplication {
	public static void main(String[] args) {
		SpringApplication.run(SaTokenQuickDemoApplication.class, args);
	}
}
After successful startup, you can use CommandLineRunner to print the default username and password to the console for easy testing:
@Component
public class SaQuickStartup implements CommandLineRunner {

	@Value("${server.port:8080}")
	private String port;

	@Override
	public void run(String... args) {
		System.out.println("\n------ Startup Successful ------");
		System.out.println("home: http://localhost:" + port);
		System.out.println("name: " + SaQuickManager.getConfig().getName());
		System.out.println("pwd:  " + SaQuickManager.getConfig().getPwd());
	}
}
3. Create a test Controller
/**
 * Test-specific Controller
 */
@RestController
public class TestController {
	// Browser access test: http://localhost:8081
	@RequestMapping("/")
	public String index() {
		String str = "<br />"
				+ "<h1 style='text-align: center;'>Resource Page (You can only enter this page after logging in) </h1>"
				+ "<hr/>"
				+ "<p style='text-align: center;'> Sa-Token " + SaTokenConsts.VERSION_NO + " </p>";
		return str;
	}
}
Note: Example source code is in the official repository under the /sa-token-demo/sa-token-demo-quick-login directory. The SpringBoot 3 example is under /sa-token-demo/sa-token-demo-quick-login-sb3. You can refer to the source code while learning. Sa-Token Integration Example Collection Download
4. Test Access
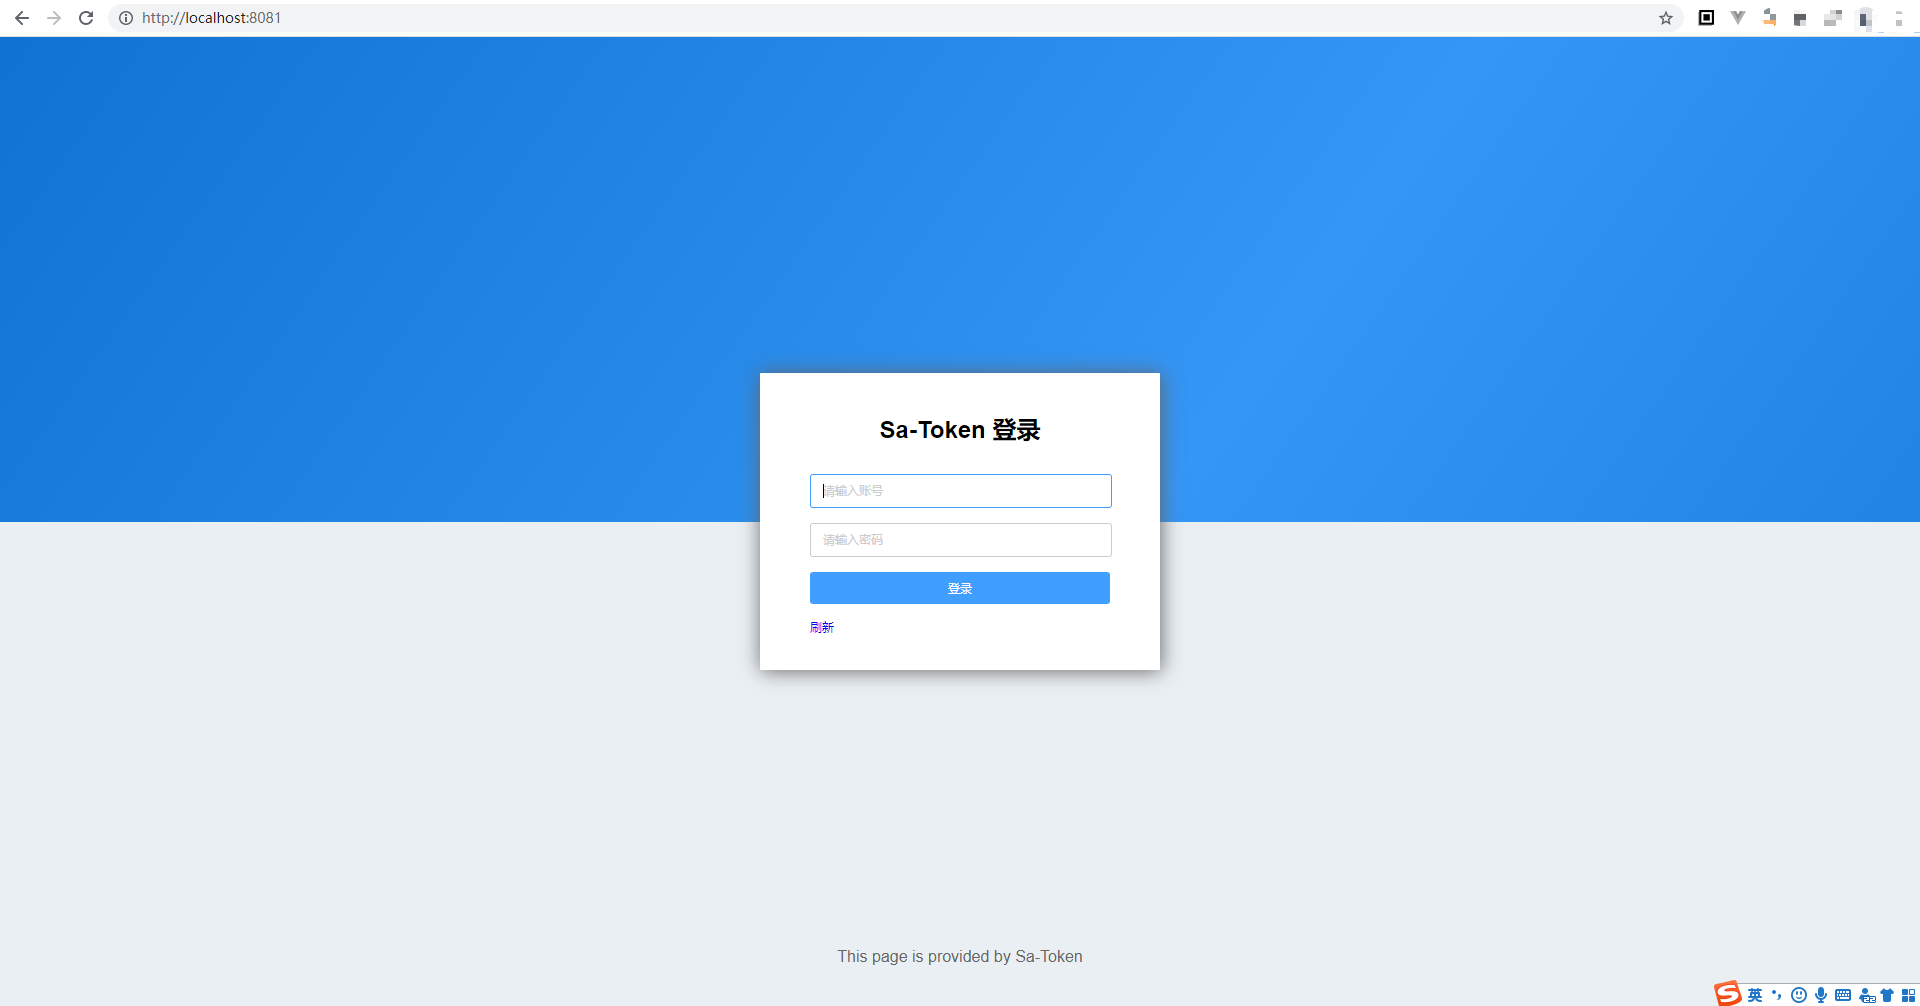
Start the project and use a browser to visit: http://localhost:8081. On the first visit, since you are not logged in, you will be forcibly redirected to the login page.
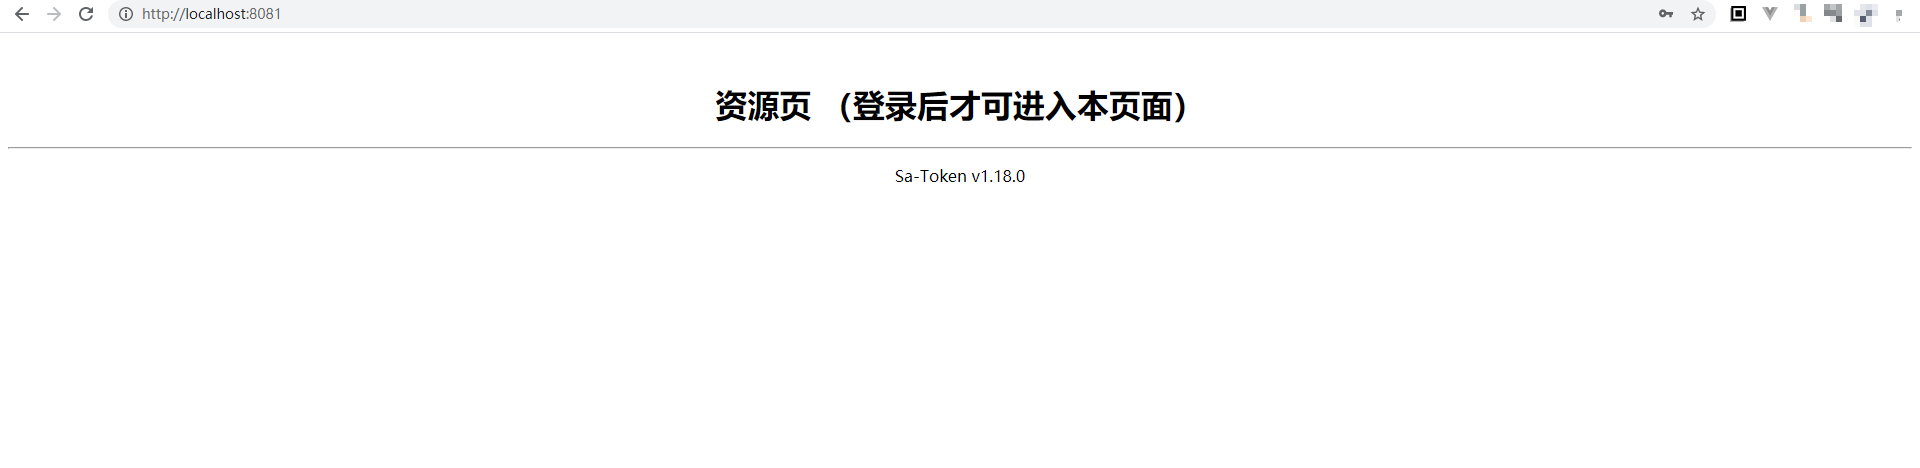
Use the default account: sa / 123456 to log in, and you will see the resource page.
You can also authenticate directly via Http Basic (generally requires a dedicated API testing tool to test properly; browsers will automatically ignore the information before @):
http://sa:123456@localhost:8081/
5. Configurable Information
You can add the following configuration in yml (all configurations are optional):
# Sa-Token-Quick-Login configuration
sa:
    # Login account
    name: sa
    # Login password
    pwd: 123456
    # Whether to automatically generate a random account and password (when this is true, name and pwd become invalid)
    auto: false
    # Whether to enable global authentication (when turned off, it will no longer forcibly intercept)
    auth: true
    # Login page title
    title: Sa-Token Login
    # Whether to display bottom copyright information
    copr: true
    # Specify interception paths
    # include: /**
    # Specify exclusion paths
    # exclude: /1.jpg
    # Open a local disk path as static resources
    # dir: file:E:\static
6. Running as a Standalone Jar Package
Using sa-token-quick-login only requires introducing one dependency to inject a login module into the system. Now we go a step further and package this project into a standalone jar package.
With this jar package, we can conveniently deploy any static website! Achieving truly zero-code injection of login functionality.
Packaging Steps
First, here's a lazy link: sa-quick-dist.jar. If you don't want to do it manually, you can directly download the packaged jar file from the open-source repository.
sa-token-demo is an independent example project, and sa-token-demo-quick-login is already included in it. Just enter that module and package it.
- Enter the example module directory
cd sa-token-demo/sa-token-demo-quick-login
- Execute the packaging command
mvn clean package
- Enter the
targetfolder and find the packaged jar file
sa-token-demo-quick-login-0.0.1-SNAPSHOT.jar
- Rename it to
sa-quick-dist.jar. Now this jar package is our final program. In thistargetdirectory, directly open cmd and execute the following command to start the jar package.
java -jar sa-quick-dist.jar
- Test access. According to the console output prompt, use a browser to visit and test:
http://localhost:8080

If you can enter the login interface, it means the packaging and running were successful.
Of course, just running successfully is not enough. Below we demonstrate how to use this jar package for static website deployment.
7. All Feature Examples
Case 1. Specify static resource path
java -jar sa-quick-dist.jar --sa.dir file:E:\www
Use the dir parameter to specify the E:\www directory as the resource directory for deployment (now we can access files under the E:\www directory through the browser!)
Case 2. Specify login name and password
java -jar sa-quick-dist.jar --sa.name=zhang --sa.pwd=zhang123
Now, the default account sa/123456 will be discarded, and zhang/zhang123 will be used for account verification.
Case 3. Specify automatic generation of account and password
java -jar sa-quick-dist.jar --sa.auto=true
Randomly generate an account and password each time it starts (will be printed to the console upon successful startup).
Case 4. Specify the login page title
java -jar sa-quick-dist.jar --sa.title="XXX System Login"
Case 5. Turn off account verification, use only for static resource deployment
java -jar sa-quick-dist.jar --sa.auth=false
Case 6. Specify the startup port (default 8080)
java -jar sa-quick-dist.jar --server.port=80
Note: All parameters can be combined.
8. Using SpringBoot Default Resource Paths
SpringBoot opens some paths by default as resource directories, such as classpath:/static/.
How to use it? We just need to create a \static folder in the same directory as the jar package, copy static resource files into this directory, then start the jar package to access them.
At the same time, we can also create a yml configuration file in the same directory as the jar package to override the yml configuration inside the jar package, as shown in the image below:
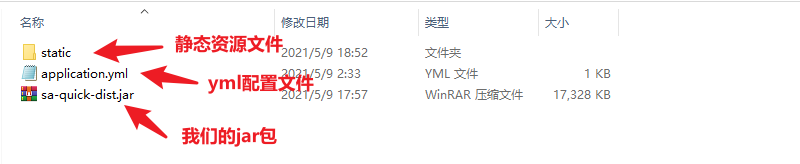
For example, in the directory above, /static contains a 1.jpg file. After starting the jar package, we can visit http://localhost:8080/1.jpg to view this file. This is a built-in feature of Springboot, so we won't elaborate further here.
References
- Sa-Token Documentation: https://sa-token.com
- Quick-Login Documentation: https://sa-token.com/doc.html#/plugin/quick-login
- Gitee Open-Source Repository: https://gitee.com/dromara/sa-token
- GitHub Open-Source Repository: https://github.com/dromara/sa-token